Showing posts with label freezer friendly food. Show all posts

Wednesday, September 23, 2015

Macaroni and Cheese Bites

An awesome recipe perfect to make ahead and serve at your next gathering!

Ingredients:

  • ½ lb macaroni pasta
  • 1 ½ tbsp butter
  • 1/4 cup grated parmesan cheese
  • 2 tbsp flour
  • 3/4 cup milk
  • 1 cup shredded cheddar cheese
  • 1 cup sliced american cheese, chopped
  • 1 egg yolk
  • 1/4 tsp paprika
  • bacon pieces if desired


Directions:

  1. Preheat oven to 425 (if you don't plan to make in advance)
  2. Boil salted water in a large pot then cook macaroni about 5 min then drain
  3. Spray muffin tins with non stick spray then sprinkle with parmesan cheese on bottom (I also sprinkled bacon bits on the bottom of mine with the cheese)
  4. In a large saucepan, melt butter then whisk in flour over medium heat for 2 minutes
  5. Whisk in milk and whisk constantly until boiling (roughly 5 minutes)
  6. Add in cheddar and american cheeses and whisk until melted
  7. Remove saucepan from heat and which in egg yolk and paprika then fold in drained macaroni
  8. Spoon macaroni mix into muffin cups
  9. At this point you can cover and refrigerate the day prior to your event
  10. Once ready to bake sprinkle the tops with parmesan then bake about 10 minutes (slightly longer if straight from fridge). Let cool 5 min and remove from pan!
I also froze some of these leftover and have reheated them for school lunches and they do great! Big hit!!!


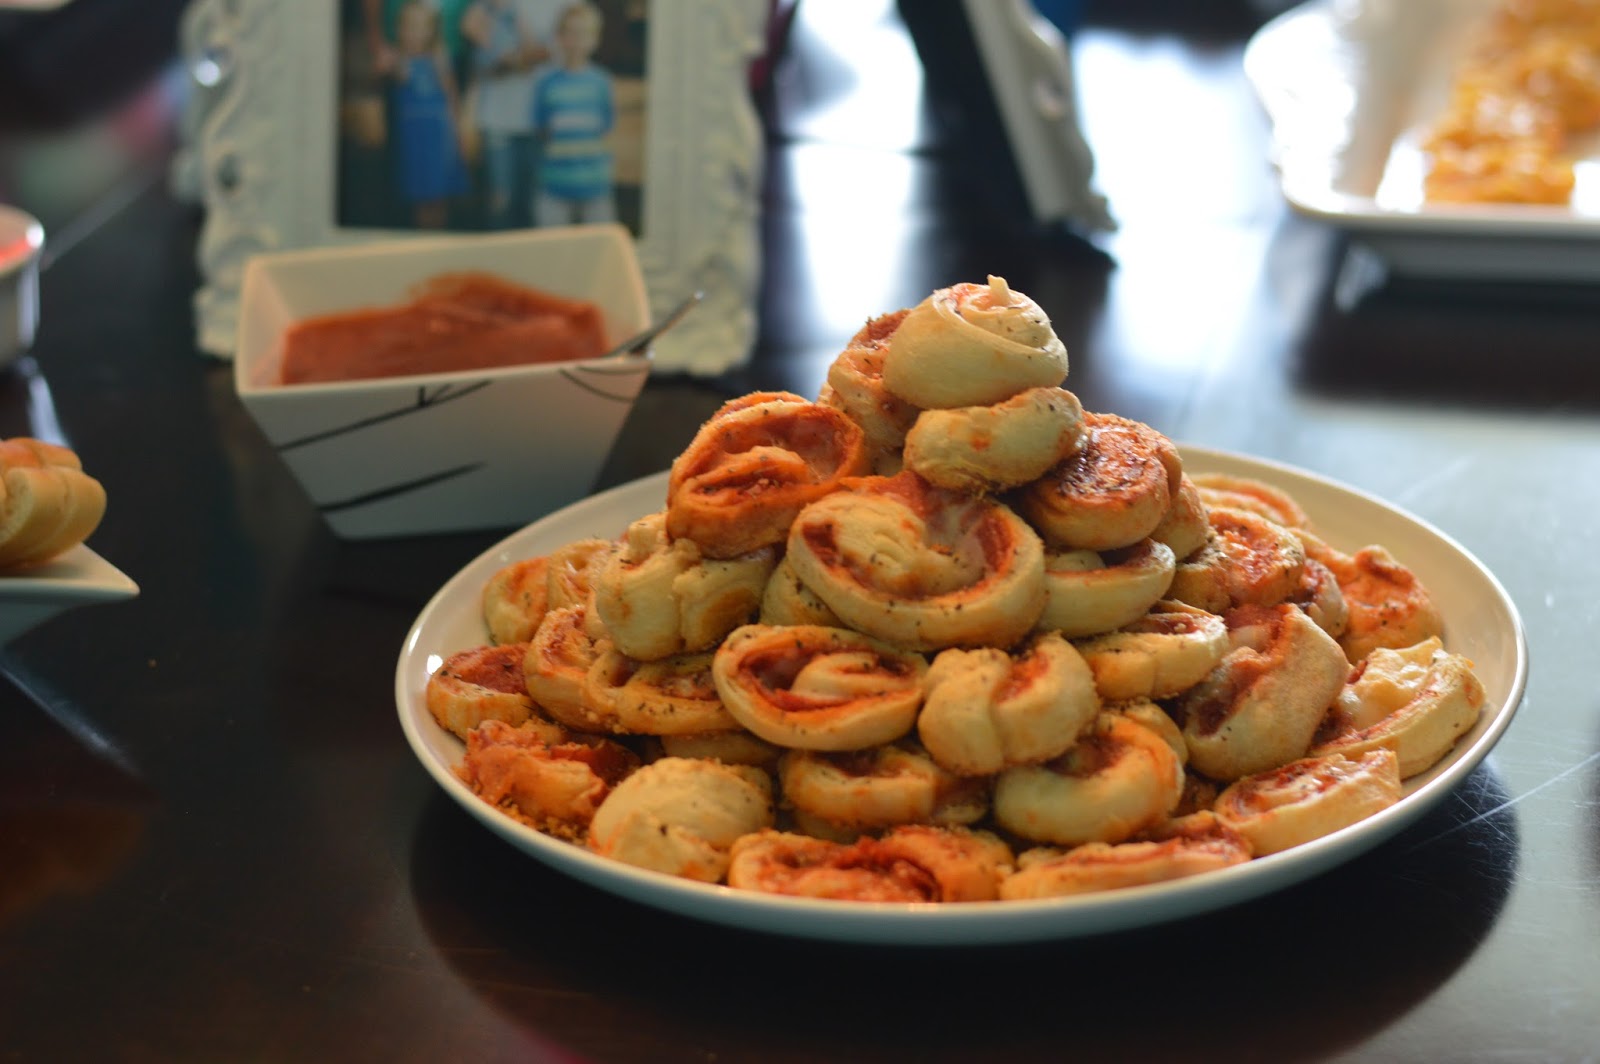
Pinwheel Pizzas

An easy party food to make in advance! Keep your party day prep to a minimum and still wow 'em! (this is double the original recipe as these are so good you'll want plenty!)

Ingredients

  • 2 cans crescent roll dough
All other ingredients are not exact, you can eye ball the amounts and easily trade things out to make your own original combinations!
  • 4 cups shredded mozzarella cheese
  • 48 slices pepperoni, cut into quarters
  • 2 cans pizza sauce (28 oz)
  • 2 teaspoon italian seasoning


Directions
  1. On a large baking sheet pinch together 8 crescent roll triangles into 4 separate rectangles. Gently stretch out the dough a little bit
  2. Spread desired amount of pizza sauce over the dough followed by mozzarella and pepperonis
  3. DO NOT overload it! I made the mistake of putting too many toppings on and then not being able to roll it ;) 
  4. Once each rectangle has the toppings, start at the long end of each dough and roll tightly in a log. Repeat with each rectangle.
  5. Place in freezer until firm, about 15 min. 
  6. Remove from freezer and cut each log into 6-8 pieces. Sprinkle with italian seasoning.
  7. At this point if you are making them in advance you can freeze them! I made mine a few days prior to my party and froze them and they were fabulous :)
  8. When ready to cook preheat oven to 375
  9. Bake until golden brown (roughly 12 min, maybe longer if straight from freezer). Serve with remaining pizza sauce for dipping! 


Thursday, September 17, 2015

Simple Egg and Sausage Burritos

Simple, quick, and freezes great!

Ingredients

  • 1 tablespoon olive oil
  • 1 lb breakfast sausage
  • 1 tablespoon butter
  • 12 eggs
  • ½ cup milk
  • ½ teaspoon salt
  • ½ teaspoon pepper
  • shredded cheddar cheese
  • 10-12 medium or fajita sized tortillas 


Directions

  1. Heat olive over medium heat in large skillet. Cook sausage and break into tiny peaces. Drain then set aside.
  2. In large bowl, whisk together eggs, milk, salt and pepper until well combined. 
  3. Heat large non-stick frying pan over medium heat and melt butter all over the pan. 
  4. Add eggs and scramble until cooked all the way through
  5. Lay out tortillas and scoop a heap of meat, eggs, and cheese onto each
  6. Fold into burrito (or pocket type shape)
  7. To freeze lay on a baking sheet lined with wax paper and place in freezer for at least 30 minutes. Store in plastic freezer bag
  8. When ready to eat (or pack in school lunches) simply place in microwave and heat until warm. Eat right away or wrap in foil to keep warm in lunch box!
I froze and went ahead and wrapped some in foil to make it even easier when packing lunch! Also makes a great breakfast on the go :) 


Friday, August 14, 2015

Carrot Zucchini Muffins

These muffins are awesome to freeze then pack in lunches for school! They thaw by lunch time and provide a healthy boost to your child's day!

Ingredients

  • 1 cup whole wheat flour
  • 1/4 teaspoon salt
  • ½ teaspoon ground cinnamon
  • 1 teaspoon baking soda
  • 3 tablespoons melted butter
  • ½ cup maple syrup or honey
  • 1 large egg, beaten
  • 1 teaspoon vanilla extract
  • 1 cup grated zuccini
  • 1 cup grated carrot
  • ½ cup raisins (I cut mine up into small pieces)


Directions:
  1. Preheat oven to 350
  2. Coat muffin pan with nonstick cooking spray
  3. Combine flour, cinnamon, salt and baking soda in mixing bowl and whisk until combined (great job for child to do!) then set aside 
  4. In large mixing bowl stir together the butter, syrup (or honey), egg and vanilla extract
  5. Add flour mixture to wet ingredients and stir until just combined
  6. Add zucchini, carrot and raisins and stir gently just until distributed
  7. Fill each cup of the muffin pan about 3/4 full
  8. Back for 15-20 minutes or until toothpick instead in center comes out clean!
These freeze well and fit perfectly into a lunch box! They are also a healthy snack for toddlers!

Thursday, September 12, 2013

Microwave Single Serving Cookie!

Warning...this is a SUPER addicting treat! While it's not healthy, at least it must be better than eating a whole batch of homemade cookies since it's only a single serving, right?

Ingredients

  • 1 Tbsp white sugar
  • 1 Tbsp brown sugar
  • 3 drops of vanilla
  • pinch of salt
  • 1 egg yolk
  • 1/4 cup flour
  • 2 Tbsp choc chips (or a little extra if you're a choc lover!)
Directions
  1. Mix all ingredients in a coffe cup
  2. Heat for 40-60 seconds in microwave
  3. While it's cooking pour a glass of milk ;)

Thursday, June 14, 2012

Breakfast Casserole Muffins

These are PERFECT for a breakfast/brunch event. They were THE HIT of the baby shower and everyone asked for the recipe! You could easily freeze them as well to warm up for breakfasts! Original recipe was found on CDKitchen.

Ingredients:
  • 1 pound sausage, browned and drained
  • 6 eggs
  • 1 cup Bisquick baking mix
  • 2 cups half and half
  • 1/2 teaspoon salt
  • 1/4 teaspoon black pepper
  • 2 cups grated cheese (I didn't use grated...instead I used shredded cheddar cheese)
Directions:
  1. Lightly grease muffin tins then place drained sausage in them.
  2. Mix eggs, bisquick, half-and-half, and salt and pepper together
  3. Pour evenly over sausage
  4. Top with grated cheese (I used shredded cheddar and just put a BUNCH of it on them, you can never have too much cheese right?!?!)
  5. Bake for 25 minutes at 350 degrees

Friday, November 11, 2011

Cheddar and Cracker Chicken

I found this recipe on Pinterest from What's Cookin, Chicago? Kye and I made it while Zach was out of town and LOVED it. I'm excited to have it re-heated once Blitzen arrives!

Ingredients:
  1. 16 buttery crackers (Ritz), crushed (about 3/4 cup)
  2. 6 ounces sharp cheddar, graded (I used shredded cheddar that I had and stuck it in the food processor to grind it up)
  3. 1 clove garlic, finely chopped (again, used my mini food processor)
  4. 1-2 stalks scallions, thinly sliced (I didn't use this at all)
  5. salt and black pepper
  6. 4 6-ounce boneless, skinless chicken breasts
  7. 4 tablespoons unsalted butter, melted

Directions:
  1. Heat oven to 350
  2. In a bowl combine crackers, cheese, garlic, scallions and 1/4 teaspoon each of salt and pepper
  3. Pound chicken to about 1/4-1/2 inch thickness with a meat mallet. 
  4. Dip pounded chicken in the butter then in the cracker mixture. Press gently to help it adhere and place on a foil-lined baking sheet
  5. Sprinkle any remaining cracker mixture onto the chicken and drizzle with any remaining butter. Bake until the chicken is golden brown and cooked through (15-20 min)
Freezer Version:

Prepare chicken as directed above. After coating it in the cracker mixture, place chicken in a gallon sized freezer bag, seal and freeze flat in the freezer. When ready to prepare, place onto a baking sheet and drizzle with melted butter. Bake as directed from frozen until cooked through, possibly 30-35 minutes depending on thickness

Sunday, October 23, 2011

Minestrone Soup

This is a low point Weight Watcher meal, can be easily frozen for storage, is super quick and easy, and is YUMMY!!!

Ingredients
  • 2 cans (14 1/2 oz each) chicken broth
  • 1 can (16 oz) stewed tomatoes, un-drained and coarsely chopped
  • 2 cups kidney beans (I used 2 cans)
  • 1 pkg (16 oz) frozen mixed veges
  • 1/4 cup shell macaroni, uncooked
  • 1 tsp garlic powder
  • 1 tsp dried basil leaves
Your soup will be more "soupy" than mine, I added a lot of extra shells then ended up adding extra broth and tomatoes to give it more liquid before freezing :)

Directions:
  1. Pour tomatoes (and juice) into small food processor and chop (or chop by hand)
  2. Combine all ingredients in a large saucepan
  3. Bring to a boil on medium-high heat
  4. Reduce head to medium-low and let simmer for 20 minutes
I doubled the recipe, added extra noodles, added extra cans of broth and tomatoes, and then froze a TON of it for after the baby arrives. To freeze I used Ziploc brand freezer bags and then got all the air out before closing it and put that bag inside another freezer bag. 


Chocolate Champion Cereal Cookies

I got this recipe from The Sneaky Chef With a new baby on the way I thought it'd be smart to start freezing several different snack and food options for Kye to make my life a little easier while adjusting to having two kids! This recipe sneaks in spinach and blueberries and have less sugar and more whole grains than most kids breakfast cereals. Sounds like a winner to me!

Kye and I actually made them together and he and I BOTH licked the bowl! They were THAT good!!! Very similar to cocoa no bakes actually ;)

 Ingredients
  • 1/2 cup rolled oats
  • 1/2 cup flour blend (I have never made the blend she recommends so I just used plain old flour)
  • 3 cups whole-grain cereal flakes, such as Wheaties or Total (I used Total)
  • 1/4 cup cocoa
  • 1/2 teaspoon baking soda
  • 1 large egg
  • 1/3 cup purple puree (you can see how to make it HERE, I have some pre-made and frozen)
  • 3/4 cup sugar
  • 1 teaspoon pure vanilla extract
  • 6 tablespoons unsalted butter, softened


Directions: 

  1. Preheat oven to 350 and line a baking sheet with parchment paper (I didn't have any parchment paper and they turned out fine)
  2. Place the oats in the blow of a food processor and process on high until oats are finely ground
  3. Add cereal flakes and pulse several times until flakes resemble crumbs
  4. Transfer processed oats and cereal to a large mixing bowl and whisk in the flour blend, cocoa, and baking soda (Kye LOVED to help whisk!)
  5. In another bowl, whisk together egg, purple puree, sugar, vanilla and cooled softened butter
  6. Add the dry ingredients to the wet and mix just until combined
  7. Drop single tablespoonfuls of batter onto the baking sheets, leaving about an inch between each cookie
  8. Flatten the cookies with the back of a fork that's been sprayed with oil to keep from sticking to the batter
  9. Bake 12-15 minutes, until lightly browned around the edges
  10. Remove from pan and let cool. Store in airtight container or freeze in sealed plastic bags
These were a big hit! Kye loved helping make them, we both enjoyed the batter, and he gobbled up his helping of the finished product. While I liked the batter, I didn't so much care for the actual cookie. But as long as he likes them that's what matters! I have them stored in the freezer ready and waiting for baby :)