Monday, March 28, 2011

Chocolate Covered Donut Holes

As you know I got a lot of my inspiration for Kye's golf party from How Does She? and these were one of my favorite ideas! They made adorable "golf balls" but the idea could EASILY be translated to other party themes!

Here's how to do them for your next party:

1. We bought 4 dozen donut holes the morning of the party. Next time we'll buy them the night before. I actually think the freshness of the donut holes made 'em tougher to work with b/c they were SO soft!
2. Mom helped out by melting white chocolate (you can buy BIG blocks of it at Walmart for much cheaper than the little white chips I used for the favors) in a double broiler on the oven
3. We dipped the balls in the chocolate, covered them in white ball sprinkles, then set them on wax paper to dry
4. When almost dry we put them on white sticks!
5. We used green foam stuff used for flower arrangements as the base. I put that on a regular old cookie sheet then we stuck all the sticks in it and covered in green shredded paper. (I bought both the flower arrangement pieces and green paper shreds at Hobby Lobby for half off!).

These were SO SO SO YUMMY. Like seriously DELICIOUS! I will be making them at many more events in the future. They are easy, adorable, and super good. They were a HIT for the party! I do think next time they will look more "ball like" by buying the donut holes in advance because they were just so FRESH that they melted right along with the chocolate ;)

Golf Ball Cupcakes

When looking at the golf party on How Does She? I thought the cupcakes she made were adorable but my first thought was green food coloring on my carpet. Um no thanks! Instead I got creative and ordered some supplies from Country Kitchen. I ordered brown cupcake liners, green long sprinkles (called jimmies...who knew?!?!) and the white golf ball toppers. 

All I did to make them was use a simple chocolate boxed cake mix then frost them with vanilla frosting and dip into the sprinkles (a 1 lb bag of sprinkles had MORE than enough for 48 cupcakes). If you have cupcakes for an event I highly recommend making them the night before. I invested in a nice cupcake holder/carrier (I have this one from Crate and Barrel actually) and I put all the cupcakes in there after I make them (I need to get another one because I have to store the extra 24 cupcakes in random tupperware!). It makes them SO moist and ultra yummy for the event! 

I think these turned out super cute and were VERY simple to make!

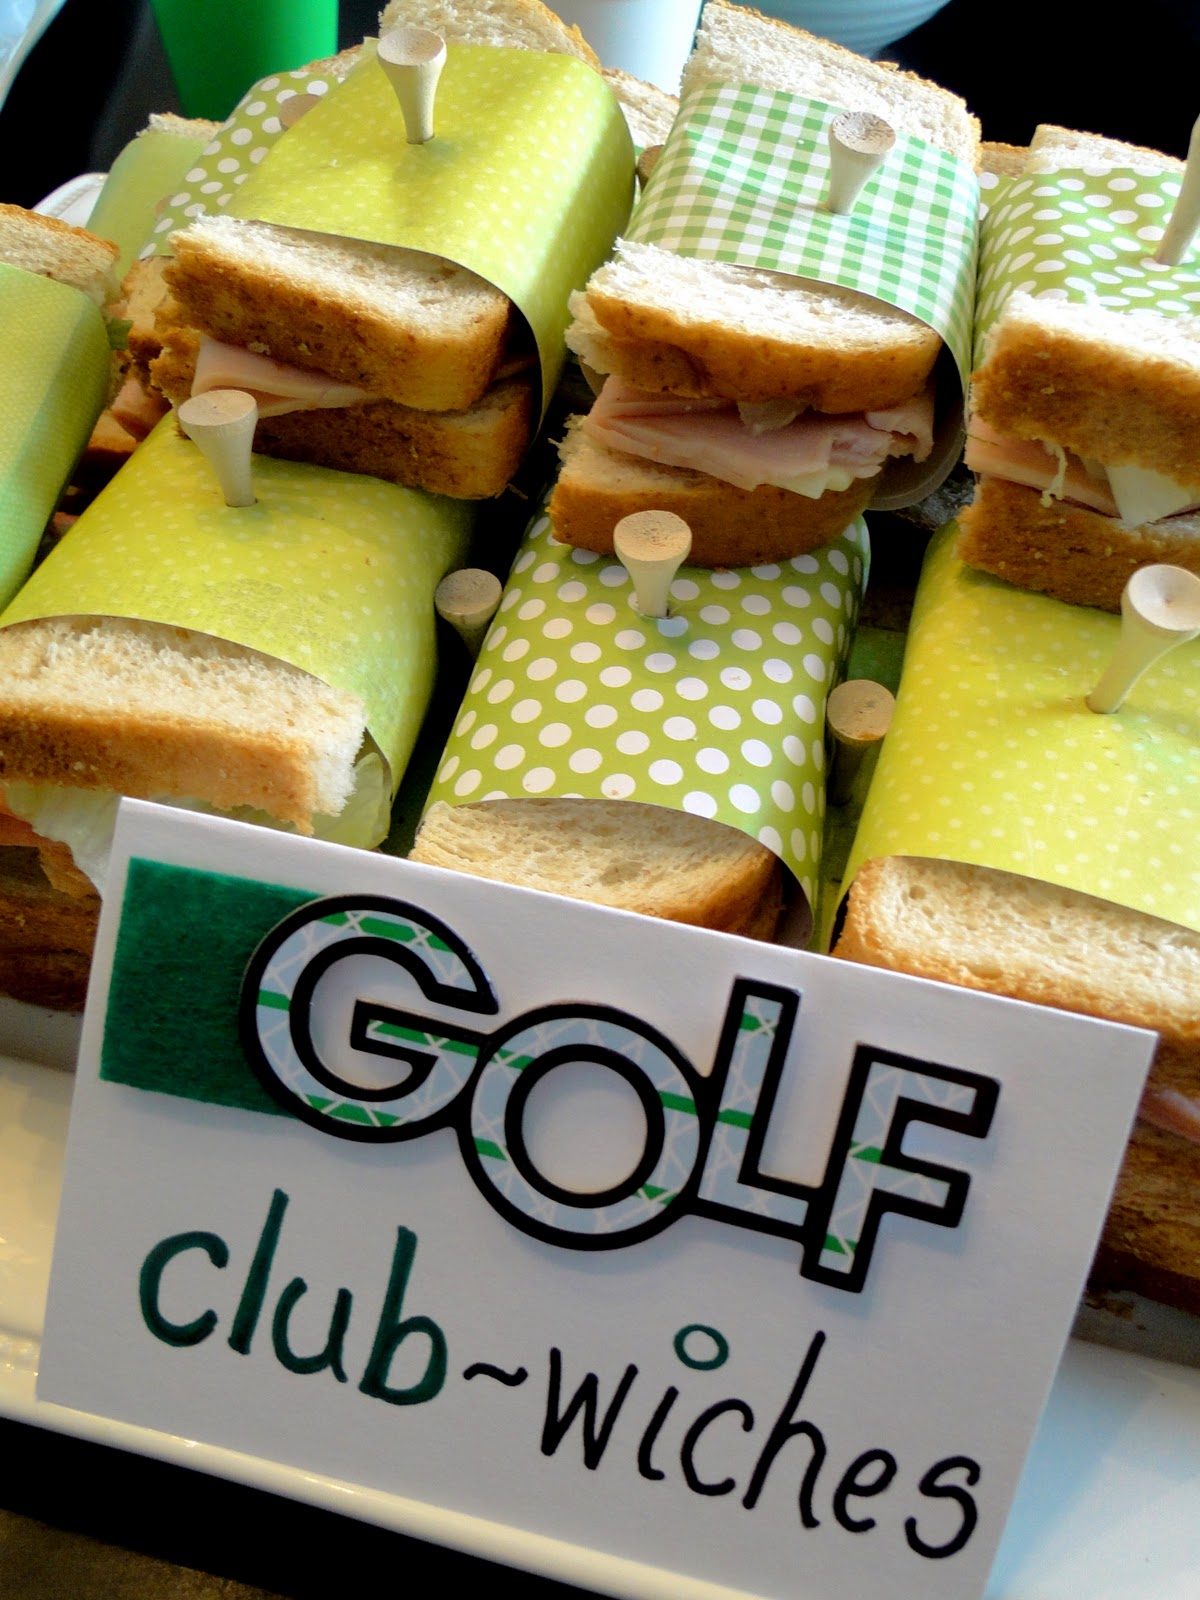
Decorative Sandwiches

Of course I got this idea from How Does She? and it's something that I will be using again and AGAIN in the future. It can work for ANY theme and it's cheap and easy (which are my two requirements of crafty diy type things!). 

1. I bought scrapbook size paper (12x12) and we cut them into strips.
2. We made the sandwiches (wheat bread, some with turkey, some with ham, american cheese, and lettuce!) and tried to keep them as neatly contained within the bread as possible. Then we simply wrapped the paper around each half
3. We stuck a custom golf tee (thanks to MidTownTees on Etsy) through each one and they looked ADORABLE!!! 

You could mix it up for a different theme with different paper and something else for the "tee" part. Or even just get colored tees to match your theme as they are not expensive at all (plus we kept all the tees people left and Zach will use them on his golf outings)

Thursday, March 10, 2011

Starr Studded Dip

I love when friends share recipes with me! I'm not creative enough to think up things on my own and I enjoy getting to taste test stuff before spending time and money making it. At my first Stella and Dot Trunk Show, Brooke Starr introduced me to this yummy sweet dip and I am pumped to use it tonight when I go to a neighborhood ladies game night and attempt to win over my neighbors ;) I think it'll be a hit!

I'm pretty sure Brooke will be happy to have me share this recipe of hers since she did hand it out at the Trunk Show and since we all helped her name it!!! :)

Ingredients
1. 8 oz cream cheese
2. 1 stick butter
3. 1/4 tsp vanilla
4. 2 tbl brown sugar
5. 3/4 cup powdered sugar
6. 3/4 cup mini choc chips (I used a whole bag though...I mean choc chips are one of those things you can't have too much of!)
7. graham crackers

Directions
1. I set out the butter and cream cheese for awhile to soften some
2. Put everything in a bowl (other than the choc chips) then whip with a hand mixer until smooth
3. Stir in choc chips
4. Keep in fridge until ready to serve
5. Serve with graham crackers

SUPER easy and AMAZINGLY yummy!
I had Zach do a taste test and he approves! Thanks Brooke :)

Thursday, March 3, 2011

Block Cards

I enjoy crafts but I also enjoy easy and cheap ones :) I saw this in a magazine and thought "finally! something we can do without having to go out and buy stuff!" We used this technique for making Kye's Valentine's Day cards, but really you could use it for any occasion.

All you need is some paper, crayons, and blocks. Easy enough? It took me AGES to figure out how to make the blocks stay still so I could make a rubbing of them on the paper with the crayons and Zach came over and figured out how to solve the problem right away. Surround your phrase with other blocks to keep it still! It worked great!!!
I did all the rubbings since Kye is too young but with an older child this would be super fun and entertaining. I rubbed the "outside" of the cards with cute Valentine's Day phrases ("SWAT," "Te Amo," "Be Mine," "So Sweet," and "I Love You") then thought it'd be a sweet touch to rub "Love Kye" on the inside of all the cards. After the rubbings were complete it was time for Kye to decorate! I gave him Valentine's Day colored crayons (reds, pinks, and purples) and heart stickers then let him go to town!

We made them for the grandparents, aunts and uncles, and even the great-grandparents! While I only heard from a couple of people who got them, I think they turned out pretty adorable, don't you?
Of course anything made by Kye is precious ;)
I'd love to see the block letter cards you come up with!

Friday, August 27, 2010

Cheesy Lunchbox Muffins

I found this recipe from The Sneaky Chef by: Missy Chase Lapine and it's a great way to sneak in carrot and sweet potato as well as some apple into your child's diet!

Ingredients:
  • 1 cup all-purpose flour
  • 2 teaspoons baking powder
  • 1/2 teaspoon salt
  • 1/2 teaspoon baking soda
  • 2 large eggs
  • 2 tablespoons sugar
  • 3 tablespoons vege or canola oil
  • 1/2 cup applesauce
  • 1/4 cup orange puree
  • 1/2 cup grated parmesan cheese
  • 1/2 cup diced cooked ham, turkey, salami or bologna if desired (I didn't add it since I typically spread peanut butter on his muffins for protein)
Directions
  1. Preheat oven to 375, line muffin tin with paper liners (if used, I just sprayed them)
  2. In mixing bowl, whisk together flour, baking powder, baking soda, and salt
  3. In another mixing bowl whisk together eggs, sugar, oil, applesauce, orange puree, cheese and optional meat. 
  4. Fold dry ingredients into the wet, mixing until the flour is just moistened - don't overmix
  5. Fill each muffin cup almost to the top, spooning about 1/4 cup batter into each 
  6. Bake 25-27 minutes until tops are golden brown
  7. Serve warm or wrap and store in refrigerator (for up to 3 days) or freezer (for up to 3 months)
  8. Defrost and place in lunchbox with an ice pack
     
    Result:

    Kye loves them and I think they will be SO useful for when Kye has a little lunchbox to take to school. I like that I'll be able to offer him variety other than just pbj and that he'll be eating something healthy without even realizing it!

    Thursday, August 26, 2010

    Purple Puree

    This is used for all recipes that call for "purple puree" it is from the cookbook The Sneaky Chef by: Missy Chase Lapine.

    Ingredients:
    • 3 cups raw baby spinach leaves
    • 1 1/2 cups blueberries
    • 1/2 teaspoon lemon juice
    • 1-2 tablespoons water
    Directions:
    1. Fill bowl of food processor with spinach, blueberries, lemon juice and 1 tablespoon of water
    2. Puree on high until as smooth as possible. If needed, use another tablespoon of water to smooth-out puree
    3. This recipe makes about 2 cups of puree; double if you want to store more. It will keep in the refrigerator for up to three days or you can freeze 1/4 cup portions sealed in plastic bags (this is what I did).  

     Results:

    This is the grossed looking puree of all! While it's gross looking, it was the easiest to prepare and I think it's one of the healthiest ones since it has both blueberries and spinach!